
Writing Reports is Important for the Floor Installer
Checking out floor problems can be a daunting task. Problems may be very obvious (picture above) but the cause could be hard to determine. The floor may be cupped, may have gaps or other defects, but nobody knows what happened. The floor looked great at the time the installation was finished.
An inspector is called in to find the cause for the floor failure. Accusations fly and the floor installer may be blamed for doing a bad installation job.
Now is the time for the floor installer report to be presented. The condition of the floor when the installation was finished needs to be evaluated. Not only does the installer report protect the floor installer from unwarranted claims, the installer report allows the inspector to find the cause of the problem by comparing measurements obtained now with measurements obtained at the time of the installation.
An installer report of moisture measurements should include several measurements from random locations and also from moisture sensitive areas such as below big windows, in entrance ways, in kitchens, by the sink and by the refrigerator. Note the following for each measurement:
- Address, name of customer, date
- Type of floor, wood species, manufacturer of floor and supplier
- Name of manufacturer of meter
- Name of moisture meter, measuring mode: pin or scan
- Settings for wood species and temperature corrections (pin mode only)
- Measuring depth
- Measuring depth for pin, integral pins or external electrode
- Moisture value
- Add relative humidity and temperature readings
- Exact locations where the readings were taken, a photo can be helpful (see picture below)
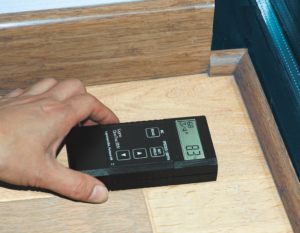
The photo (right) should show an easy to identify “landmark”: Here a corner with a low window sill and special moldings. The photo should show the moisture value and the meter settings if possible. It is also important to show the hand pressing the meter against the floor. (When taking a reading pinless meters should be pressed slightly against the surface.)
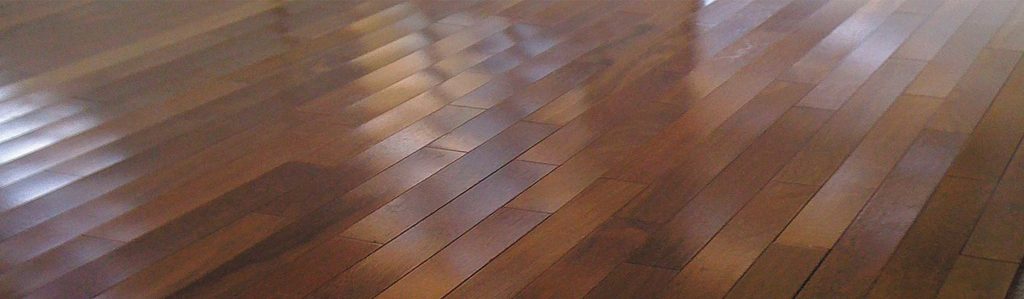
Cupped Floor:
The floor in the photo (top) may have been installed with a high moisture content and cupped during drying. Now, when the moisture of the floor is checked, the meter may indicate a perfect 7%, but the floor is not perfect. The first question is, what was the moisture at the time of installation, what meter was used, which setting was used?
It could be possible, that the floor planks were installed at the right moisture content, but the sub floor and the concrete underneath had too much moisture. The floor cupped, when moisture from below the floor was absorbed. The bottom of the planks expanded but the dry top layer did not follow.
Without any moisture measurements from the time of the installation, it is anybody’s guess what the moisture originally was. The inspector can only find out what the moisture is now.
Recommendations:
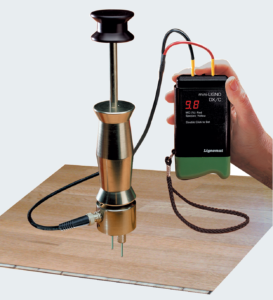
Dual-depth meters from Lignomat are ideal to document floor conditions: Readings can be obtained at 1/4″ and at 3/4″ deep. The 1/4″ depth reads the top layer, the 3/4″ depth includes the core. Measurements taken at 1/4″ and 3/4″ deep truly pin-point the moisture condition of the floor.
Thermo-Hygrometer or Datalogger BL2 are ideal to document ambient conditions: Use a Thermo-Hygrometer to measure the relative humidity and temperature at the time the moisture readings were taken. Better yet leave a datalogger BL2 on site to record relative humidity and temperature. The BL2 takes 6 readings per day for 8 years. The BL2 graph actually shows EMC.
Dual-depth Pinless Ligno-Scanner:
Ligno-Scanner SD
Ligno-Scanner SDM
Ligno-DuoTec BW
Ligno-VersaTec
Pin Meter with Slide-Hammer:
mini-Ligno DX/C
Ligno-meter K, available with Electrode E12
Ligno-VersaTec, available with Electrode E12